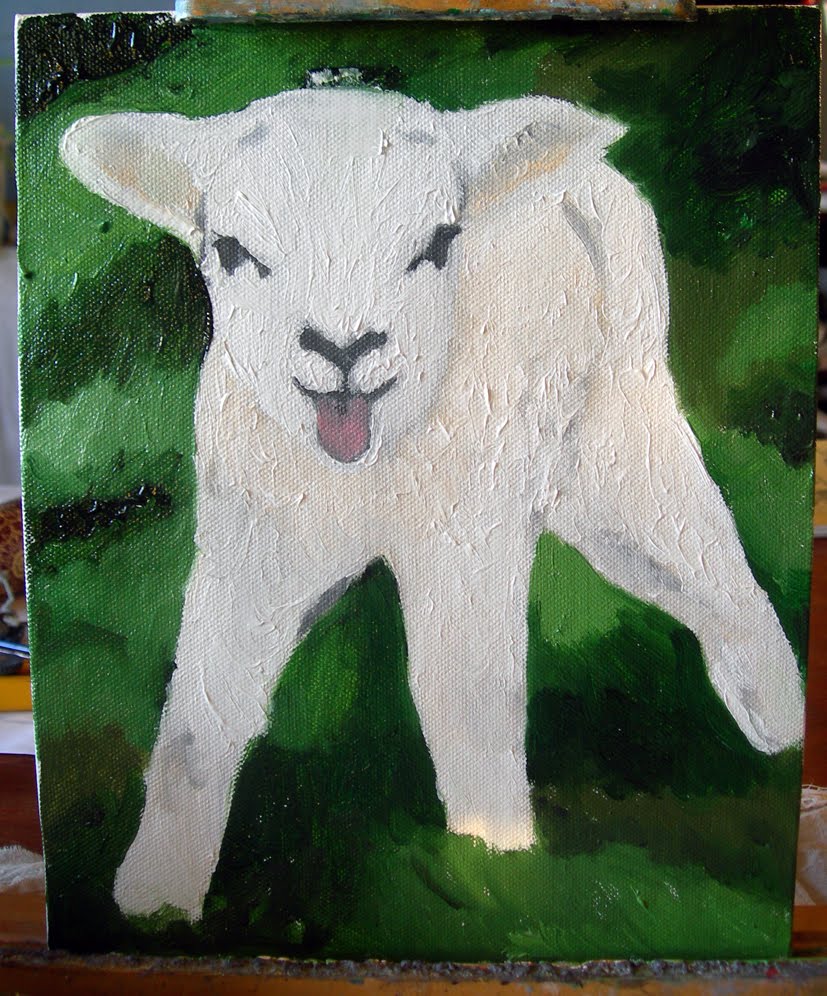
I have a tendency to forget to stop and take pictures of in-progress paintings (and drawings).

So being forced to do so was a very good excercise. I figured I would try and be inspired by the seasons, this time, and lo, few things so symbolise it to me as little baaah-lings, that is lambs, and their bleating. I was thinking of adding a small faery or something to the picture, but completely forgot in the joy of finding such a cute subject without much effort anyway. I used an F3 canvas board and oils, which I had been itching to do for quite some time. In fact, itching so much that you will see I made all three or four weeks' worth of assignments in almost one go (I think I finished them all in a week).
I found myself a nice reference picture (I was looking for one with black head and grey wool but found this delightful little fella) and set about it. First, sketching with an HB pencil (I find 2B smudges too much when painting over it on canvas and the like)

the outlines of the little lamb, and also some of the shadows. In hindsight it would have been better to choose a more colourful picture, and one with more contrasts. Next time, next time.
Then, I brought out grandmothers charcoal and filled in the shadows, marking them properly. This, again, told me that another subject would have been better as charcoal does smudge something terrible and I was painting an awful lot of bright or pale colours. Regardless, filling in the shadowed parts a bit more is a good way of adjusting the eyes and mind to remember that here be shadows. (Another interesting thing to note is how the light changes throughout the pictures - I prefer to paint during daytime, to make use of natural light, but since the light itself changes and so do colour values throughout the day, until it becomes, even with lamps, too dark, it's not always without its faults or troubles).

(It also makes it easier to get a proper representation of the colours when you photograph a painting, something which has made me gnash my teeth both once and twice. They look so great in real life, but transferring them to the screen is another matter).
I started out painting the main subject, the lamb itself. Mainly because it consisted of pale colours and a lot of white mixed in (but very few areas are actually completely white - one of the interesting things with white is that you have to paint other colours in order to make it look white, especially shadows), but also because I had a fair idea of how I was going to paint it, whereas with the grass I was uncertain as to how best go about it. As you can see, I began by working from the groundwork I had already done, filling in shadowed or more obviously coloured areas first, as well as covering with various shades of white. I am currently using a mixed-white oil colour, to get some kind of the best of both worlds.

Titanium white really dries slowly, but it has a lovely shade of white.
Smoothing out some sharp lines, I then went on with the grass, trying to catch the general colour. All in all it became much too dark, so as you will see, I worked to lighten it up and also to try and get some of the blatant green-ness out of it.
Again, I worked in my seemingly usual way: Fill in the large areas, then add details. I've a hard time painting with any kind of pointillist technique, but maybe next time... Between the first and the second picture with the grass painted, I took a pause overnight. Once again the delight (and annoyance, more on that later) that is the fact that oils doesn't dry immediately, helped. I could pick up my brushes the next day and without problem use a technique I am very fond of; wet in wet, blending colours seamlessly. Then came a few hours of dabbing here and there to start giving it a bit more of texture

(once again something oils excel at, though at times I find that certain artists use it carelessly and much too extensively, creating a muddy and clotted image), filling in shadows that I accidentally made too light, looking critically between painting and reference, looking up new audiobook chapters of "Harry Potter and the Order of the Phoenix" (I have to grit my teeth, I admit, to get through it - few times I have wanted so badly to do bad things to fictional characters but Umbridge, oh dear...), switching madly between brushes to get the right look for the grass and avoid using brushes with green colour on areas of white.
Colour constancy is an interesting subject, and suffice to say that a bit of reading and research on the matter helped immensely in making me realise that I needed a lot of brown in the green grass. Said and done, and suddenly everything got a lot better.

I used almost pure Ivory Black on the eyes and nose, I think I blended in a bit of brown though, and as you can see in some areas the nose is blended rather than monochromatically black beside white. And despite them not being there in the reference, there is a white dot in both eyes, to give them more life. Old painter's trick.
The difference between near-finished and final is, in some areas, almost startling. The tongue is a lot more lifelike, shadows and texture are suddenly visible, and I did in fact mellow the line between nubs of horns and hair on top of the lamb's head a bit, after the final picture was taken. Now it's lying on the top shelf of a cupboard just to try and keep it out of the way until it dries. Which will take several weeks. So, there we have the downside with oils not drying quickly - you have to keep them safe until they are dry, otherwise the paint will get everywhere and the painting will be ruined, and oil colour stains are rather tricky to get out of fabric and clothes.

All in all, I am very, very happy with this very cute picture of a bleating lamb. I look forward with putting this up on a wall, but I'll have to cover it with glass, or it'll be ruined from me trying to cuddle it. In real life it is cute as a button! So yes, once again I do myself proud. I'm again hesitant to call it impressionist, but I'll leave that to others to say if it is or isn't. Tell me and I'll happily revise the tags.
It took me more or less two full days to paint, and having smell-free brush-cleaner was vital. On a sidenote, I also use this to thin the paints, as I do with water and acrylics. I have had comments on me somehow managing to paint very thin colours, but I suppose it's part of my own expression, maybe?